Demo Video
Overview
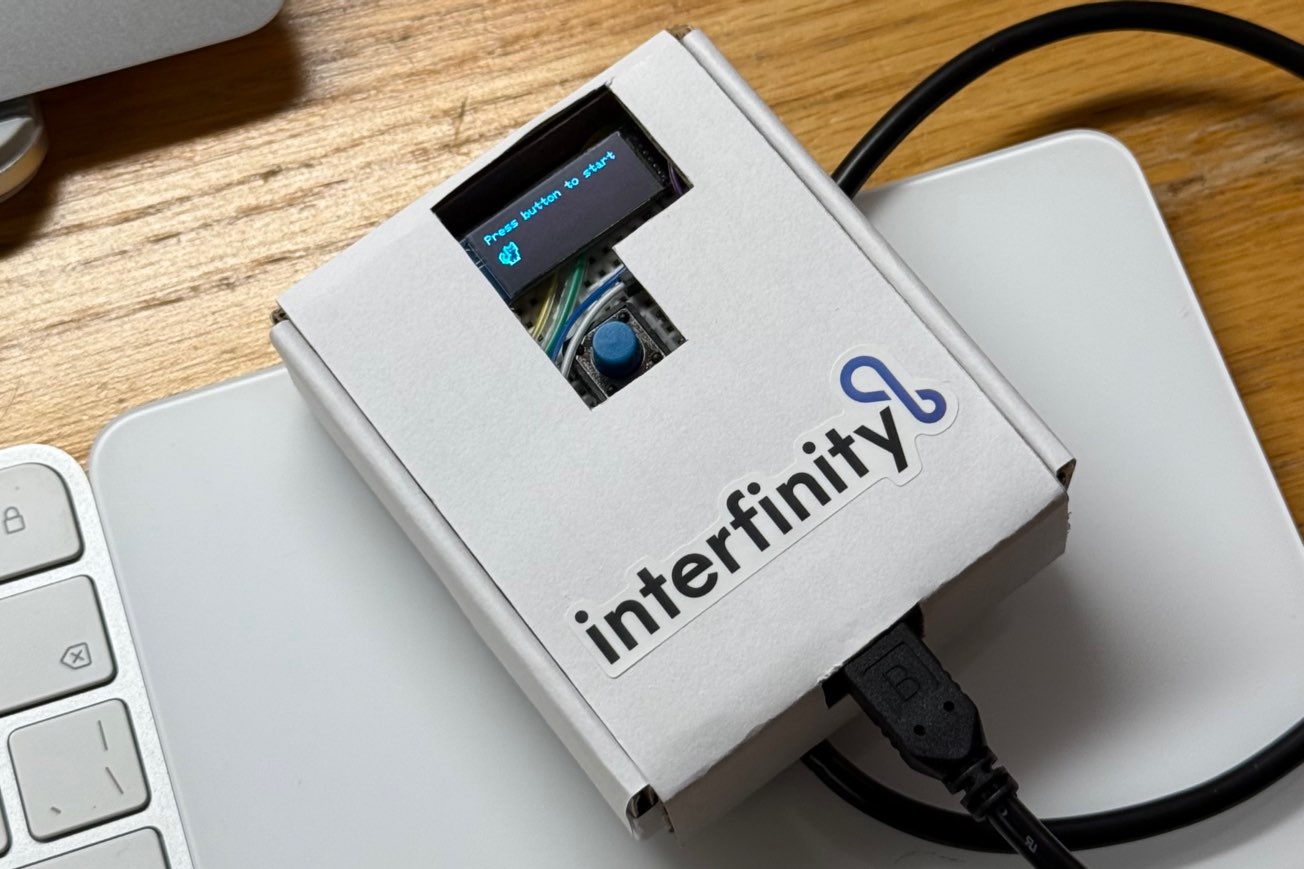
I wanted to further utilize the OLED display which I been experimenting with. So I aimed for a simple game that runs on the display. The OLED display that I bought has a resolution of 128*32 pixels, which means it's quite long and narrow, a good fit for a 2D runner game. So I built this CatRunner Game where the player controls the pixel cat to run in the upper or lower half of the screen and avoid the obstacles by tilting the device upwards or downwards.
Process
I started out with exploring how to move the obstacles from right to left on the screen to create the feeling that the character is moving to the right. In order to draw a basic obstacle (a rectangle) on the display, I used the display.drawRect() function:
display.drawRect(x, 16, 8, 16, WHITE);where the variables x and y are the position of the rectangle, and WHITE is the color, since my display is monochrome blue, WHITE will actually show up as blue. And in order to make it move from right to left, I set the initial position of x to be 128, which is the rightmost position of my display, declared a variable named speed, and in the loop() function, subtracted speed from x:
int x = 128;
int speed = 1;
void loop() {
  x -= speed;
}
And in order for multiple obstacles to show up on screen at the same time, I declared 3 different x variables and used display.drawRect() three times. Next, to randomly place the obstacles on the upper half or lower half of the display, I used the random() function and an if statement as shown below:
int yRandom = random(1, 3);
if (yRandom == 2) {
  rectUp1 = true;
} else {
  rectUp1 = false;
}
the program generates a radome number that is either 1 or 2, and assign true or false to the variable rectUp1, which controls whether the first rectangle will be drawn on the upper half or lower half of the display. Then, I need to create the character, which, at this stage, would be just a square. I drew the square using the same display.drawRect() function, and instead of moving from right to left, it moves up and down based on player input. I first used a button as the input, when the button is pressed, if the character in up, it will be moved down, and if it's down, it will ve moved up. So here's my first prototype:
After the game was functional, I wanted to add more details and make it more fun to play. So instead of the square I used for my character, I drew a pixel art cat, which looked like this:
![]()
with 2 frames, when switching between them, it creates the effect that the cat is walking. I then used a tool to create my image into the bitmap format which my Arduino and OLED display can utilize. (Here's a link to the tool I used: https://mischianti.org/images-to-byte-array-online-converter-cpp-arduino/#google_vignette) It converts my 16 by 16 pixels image sequence into the following:
const unsigned char cat[][32] PROGMEM = {
  { 0x00, 0x82, 0x01, 0x45, 0x01, 0x39, 0x31, 0x01, 0x49, 0x01, 0x89, 0x25, 0x91, 0x01, 0xa1, 0x01, 0xa1, 0x82, 0xa2, 0x04, 0x9c, 0x04, 0x48, 0x04, 0x38, 0x04, 0x09, 0x24, 0x09, 0x24, 0x0f, 0xfc },
  { 0x00, 0x82, 0x01, 0x45, 0x01, 0x39, 0x31, 0x01, 0x49, 0x01, 0x89, 0x25, 0x91, 0x01, 0xa1, 0x01, 0xa1, 0x82, 0xa2, 0x04, 0x9c, 0x04, 0x48, 0x04, 0x38, 0x04, 0x0c, 0x98, 0x0c, 0x98, 0x0f, 0xf8 },
};
and then I can use the display.drawBitmap() function to draw my cat on the display.
int frame = 0;
unsigned long catTime = millis();
int yPlayer = 0;

if (millis() - catTime > 200) {
  catTime = millis();
  if (frame == 0) {
    frame = 1;
  } else {
    frame = 0;
  }
}

display.drawBitmap(0, yPlayer, cat[frame], 16, 16, WHITE);
By switching between frames 0 and 1 every 200 milliseconds, the cat appears to be always walking. Moreover, I wanted to change up the interaction method for the player to make my game more interesting. After some research, I figured that my Arduino (Arduino Nano 33 IoT) has a built in gyroscope, which can detect rotational movements in terms of angular velocity. So I decided to utilize this feature and when the player tilt up the device, the cat moves up, when the player tilt down the device, the cat moves down. To achieve this, I first installed and imported a library for the built-in gyroscope:
#include <Arduino_LSM6DS3.h>and then read from the gyroscope in the loop() function and move the cat accordingly.
if (IMU.gyroscopeAvailable()) {
  IMU.readGyroscope(x, y, z);
  if (y > 75) {
    yPlayer = 16;
  }
  if (y < -75) {
    yPlayer = 0;
  }
}
After adding a start screen and a game over screen, adding a score counting based to survival time, my game was complete.
Finishing Up
In order to make my device look more like a hand held game console (like the gameboy), I used a smaller breadboard and made an enclosure out of cardboards and tape, with cutouts for the display and button.